Just down the road from Jali, in sunny Preston, Kent, lies a new-build house robed with stylish, yet contemporary panelling. Panelling a room is so easy to do and the results are elegant and impressive. As our very dapper customer Andrea says:
It can be quite challenging to create character and warmth in a new-build house, but the impact of panelling just one wall was quite astonishing in terms of transforming the space. We love it!
Andrea and husband Kev began their faithful Jali journey back in 2003, when they fitted their Victorian terrace house in Herne Bay with radiator covers. Originally, Andrea found Jali after a search online but says she held the Jali designer tool in mind when it came to revamping their next home in 2017. The new-build house in Preston called for a more contemporary look, so this sporting pair didn’t hesitate to get more radiator covers to suit – this time opting for a more modern feel. It was whilst using the online designer for the covers that Kev noticed, amongst Jali’s wide range of products, the MDF Shapes.
Shapes, of course, equals panels. So, with artful customisation, their idea of panelling the bedroom became a very successful reality. Having sourced the MDF shapes from Jali for the bedroom, it’s no secret that they’ll be coming back for more shapes to panel their living room!
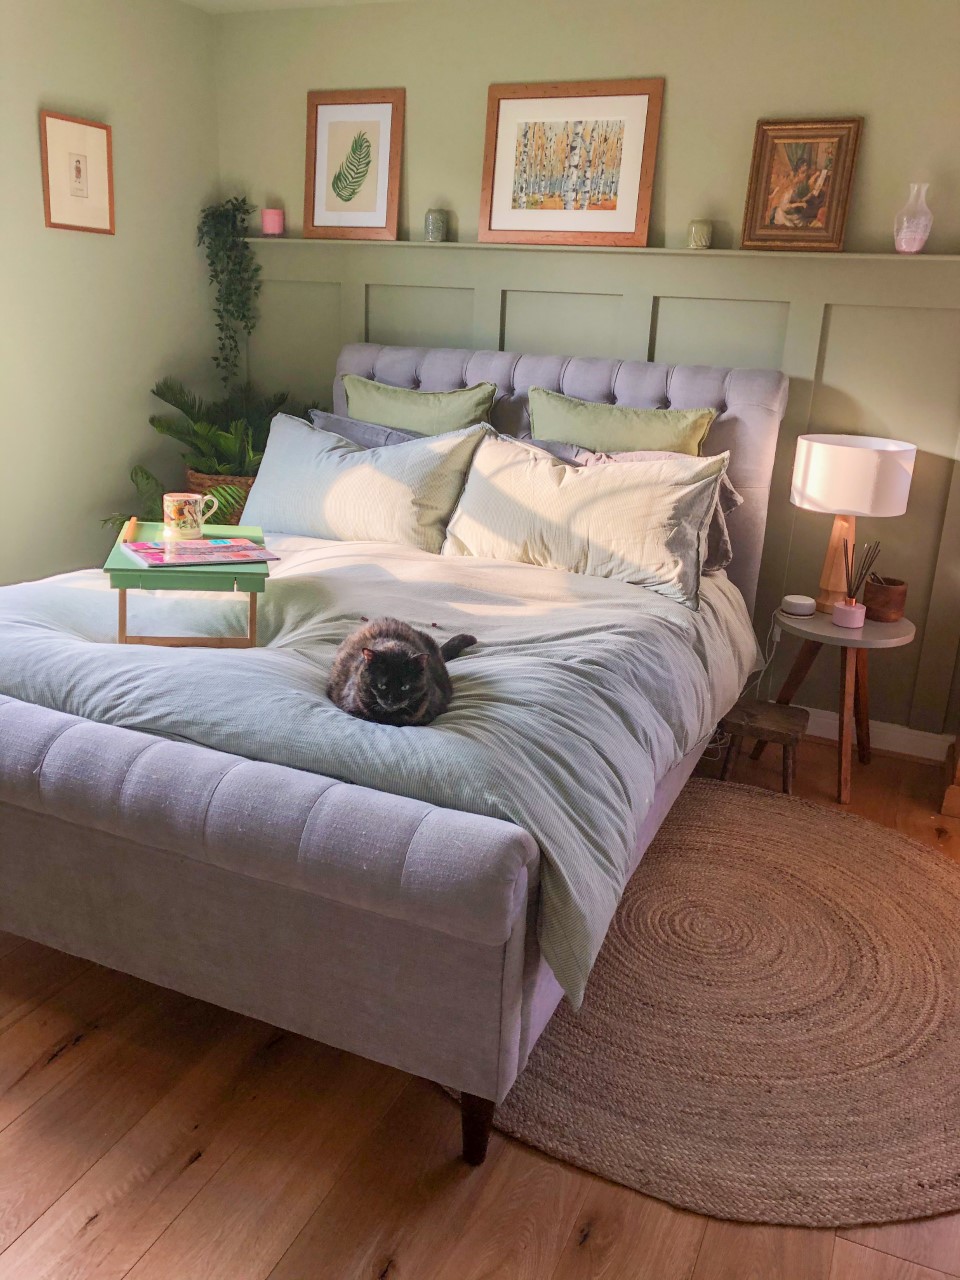
Purrrfect Panelling
From ho-hum to wholesome – how did Kev fix the panels to the wall?
Kev only had to make four straight cuts with a circular saw through some of the MDF shapes (he could have also used a hand saw) – this, he said, was just to shorten some of the lengths. Then he used Grab Adhesive to fix the shapes to the wall; no preparatory work was required. The little shelf at the top (where they’ve propped up a few pictures) was made from two-inch softwood, repurposed from an old slatted shelving unit. This was screwed and stuck to the wall. Kev since realised that this shelf could also be made from 18mm MDF Shapes from Jali, so he says they will definitely design this way when they panel the lounge.
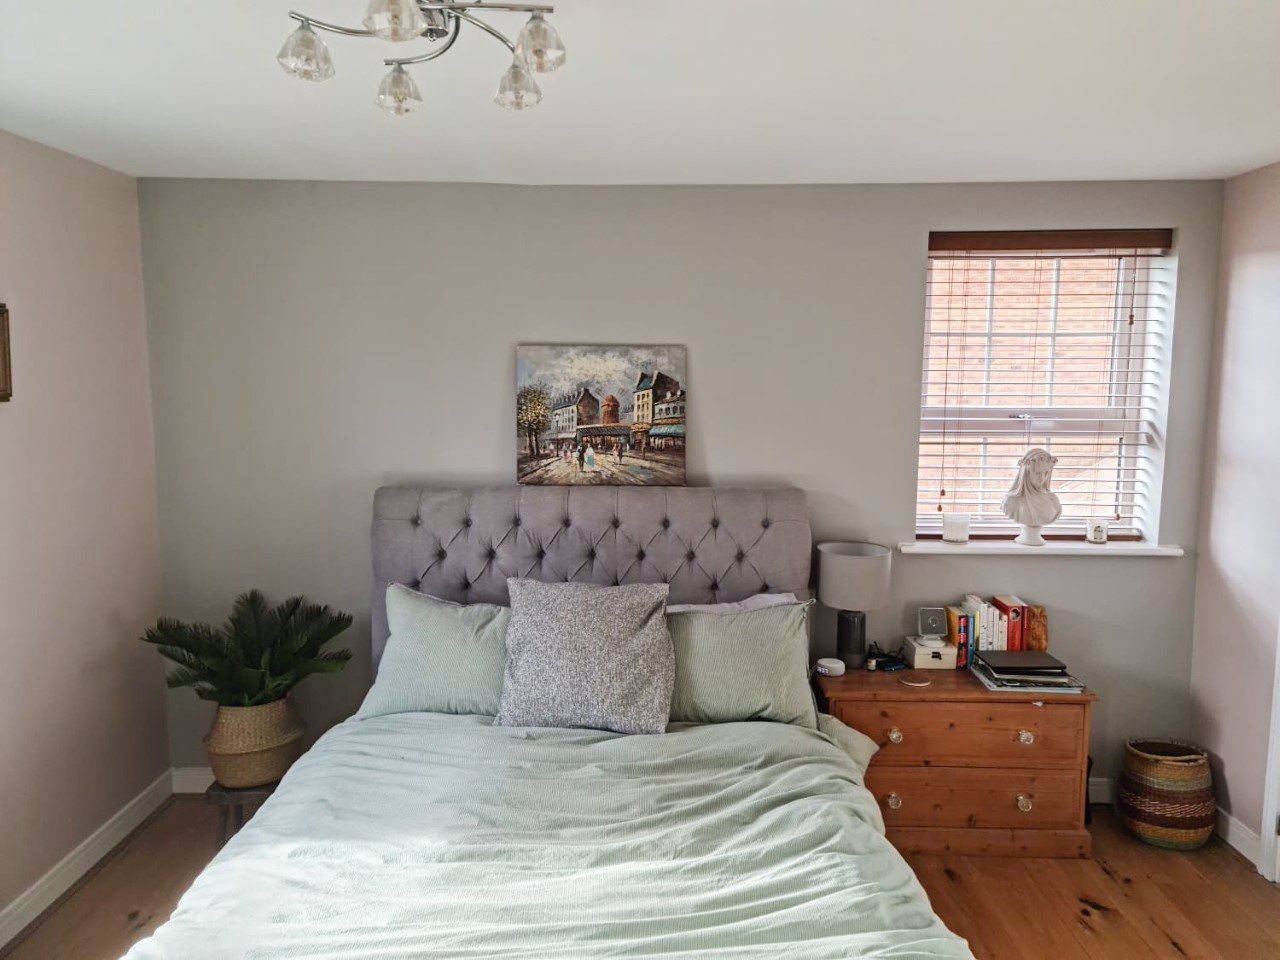
What happened next; how did Kev join the panels together?
Having stuck the shapes to the wall, Kev used a flexible caulk around all of the edges of the panels to fill in any gaps. Once dry, he sanded it down and then applied MDF primer before applying an undercoat and three coats of emulsion paint.
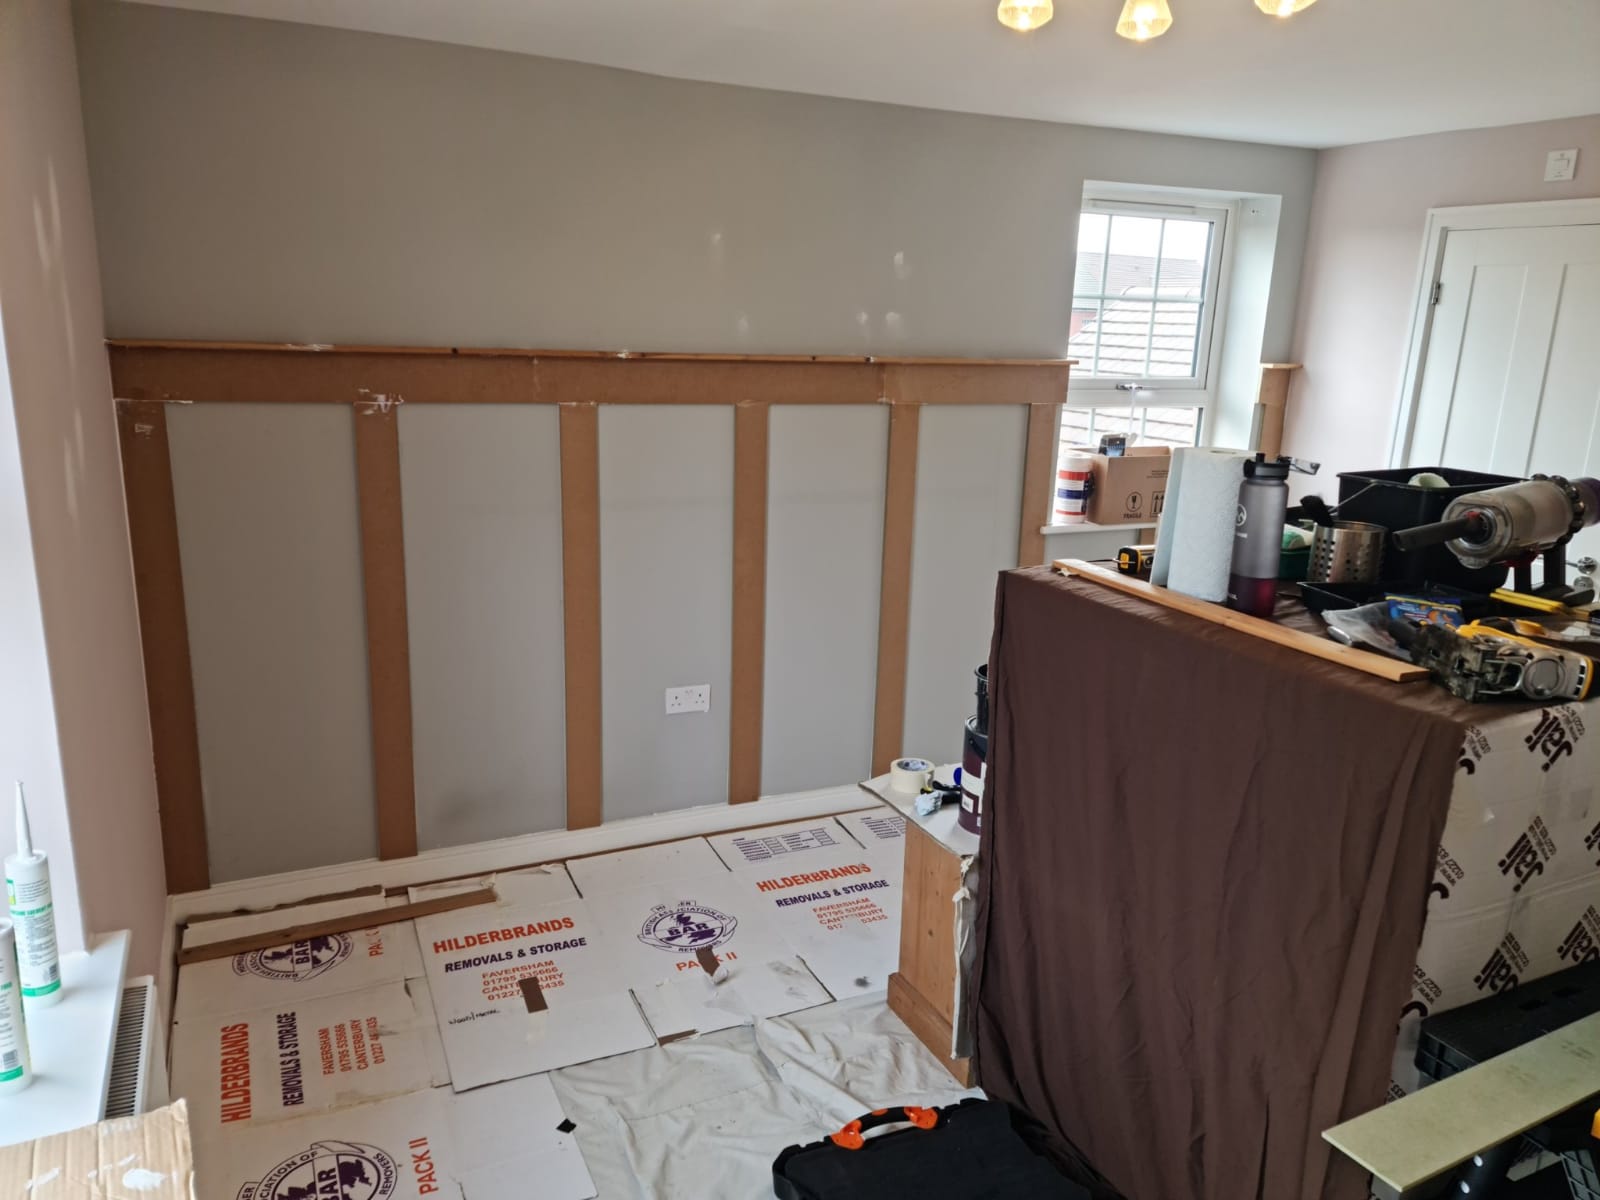
Watching the clock – how long did the project take?
From start to finish the bedroom took three days but from this, only about eight hours was spent on the panelling. Kev also painted all the walls – and the ceiling – with two different shades of green; Farrow and Ball Estate Emulsion Lichen No 19 (for the panelling) and Farrow and Ball Estate Emulsion Vert de Terre No 234 (for the walls and ceiling).
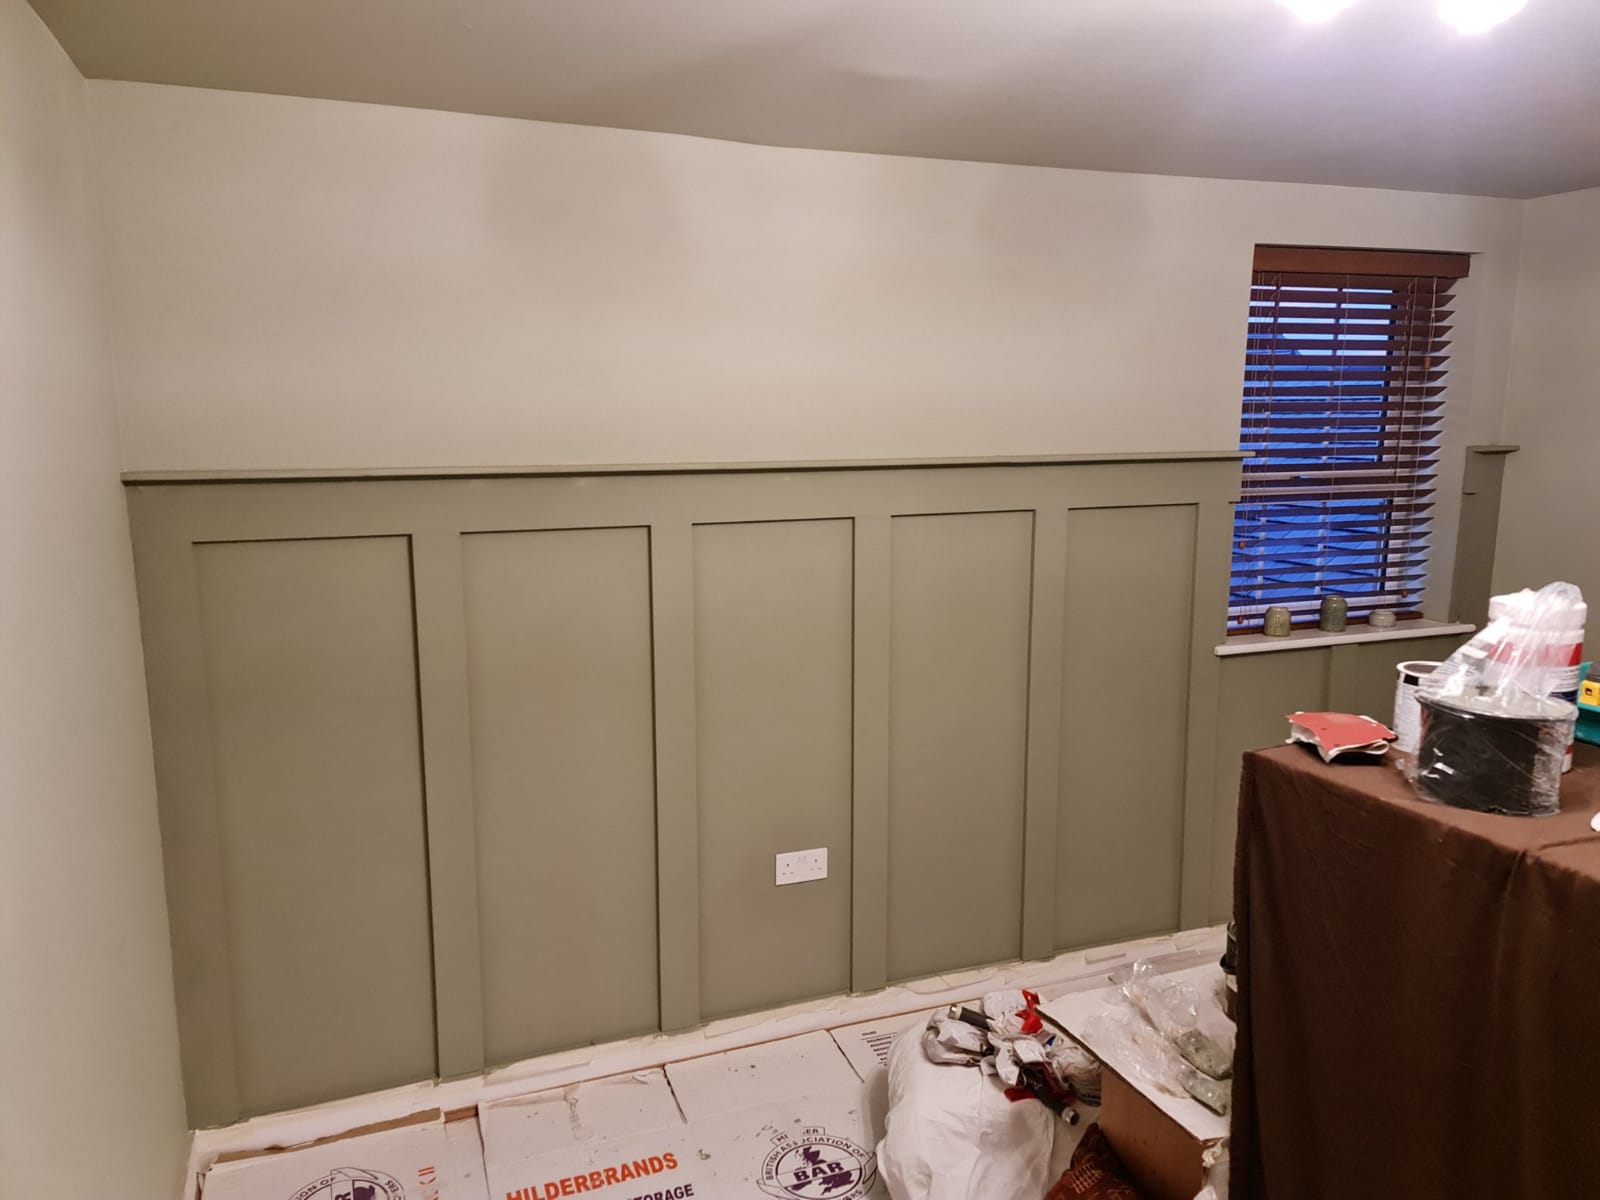
All wrapped up – so what was the budget?
The estimated budget for the whole bedroom project was £220 – a price that included the paint, the panelling, caulk, adhesive and everything else they needed. However, and most importantly… the 11 MDF shapes for the panelling cost Kev and Andrea just £124.
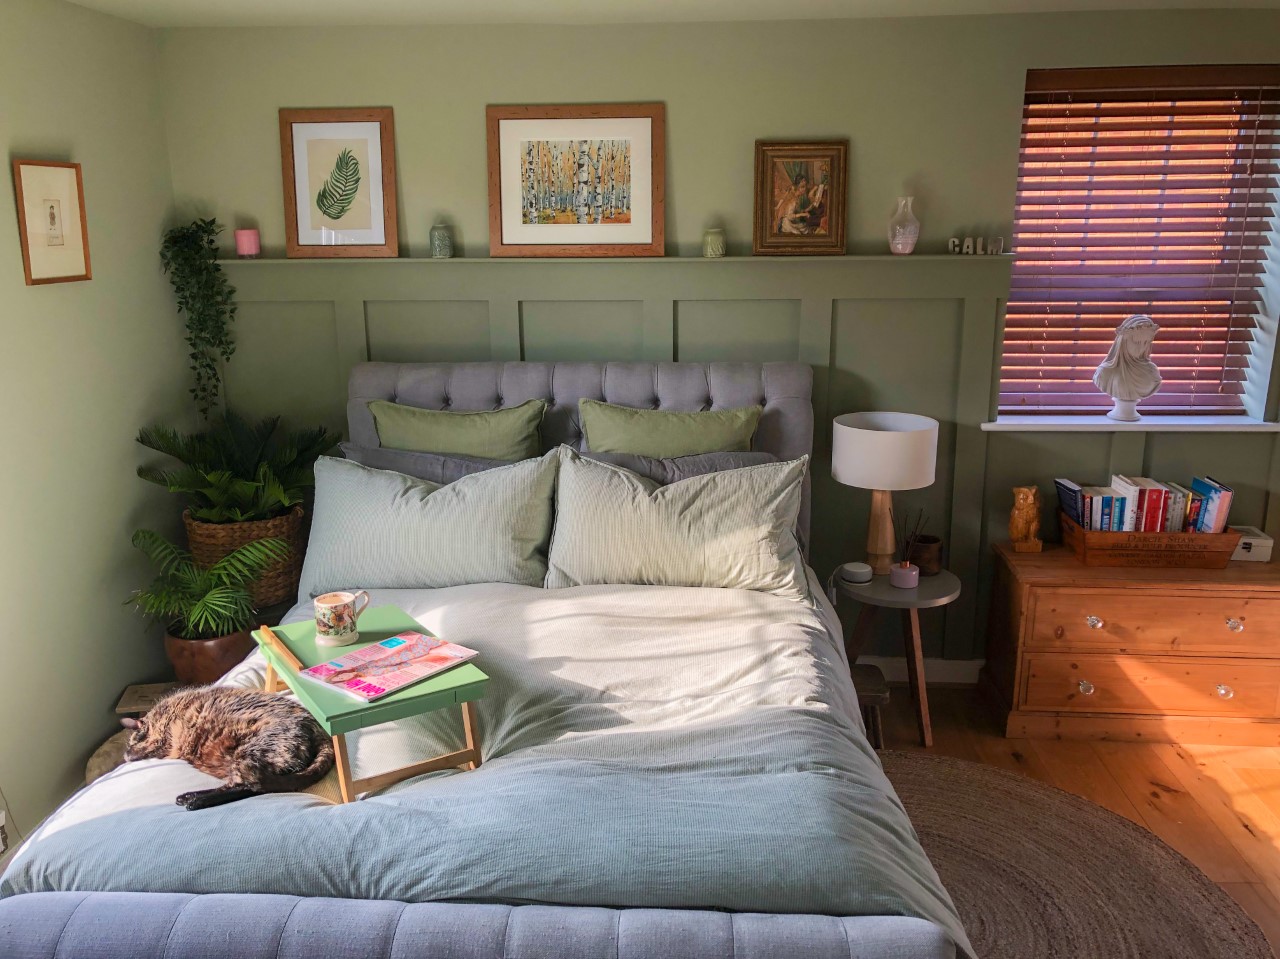
Tadaaa!! Shhh – let sleeping cats lie…
Would you like to achieve the same result? Design your own MDF shapes and buy them today!


