Although Jali currently does not offer L-shape unit kits, you can still create your own L-shape storage using our online designer. Please note, this guide applies to both Bookcases and Cupboards. For Dressers or TV units, it is feasible as long as the top and bottom sections share the same depth.
Before you begin, there are a few considerations:
You will lose a small space in the corner where the units meet
You will need to trim one of the skirtings and top boards on the units on site
This guide assumes you have designed your units’ tops and skirtings without any decorative mouldings. It is possible to create this configuration with mouldings, although you may need to make additional adjustments where the moulding details meet.
Step 1.
Design the 2 units you would like to join together
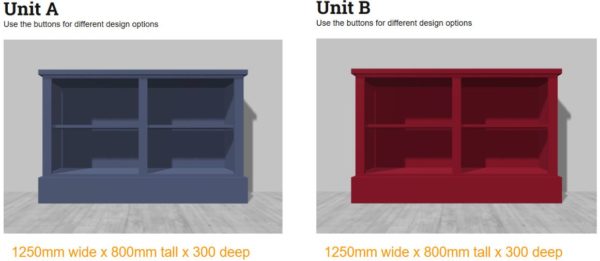
Please note both units do not need to be the same depth, we have done so on this guide for simplicity.
Step 2.
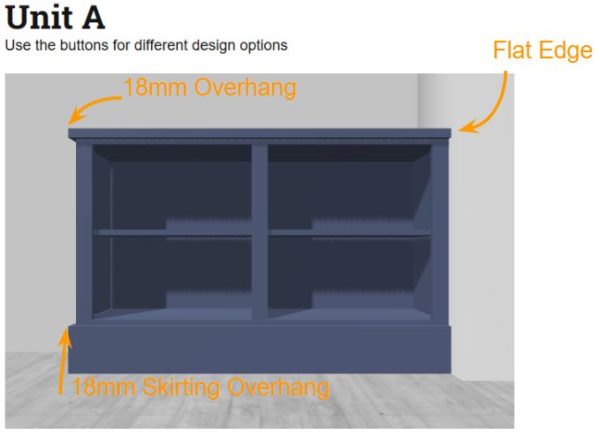
Determine where the units will join. In this example, we will join Unit A’s right-hand side (RHS) with Unit B’s left-hand side (LHS).
Position Unit A against a right-hand wall by navigating to Advanced > Situation > RH Corner. That side will currently have an inset of 18mm to allow anyone who simply wants to fit it against their wall to have 18mm extra material to scribe. However we won’t require this in this case, so you will need to make that side flush (flat) by going to Advanced > Fitting > Insets. Here, change the 18mm inset that appears on the right to 0mm. Once done, it’ll look as below:
Step 3.
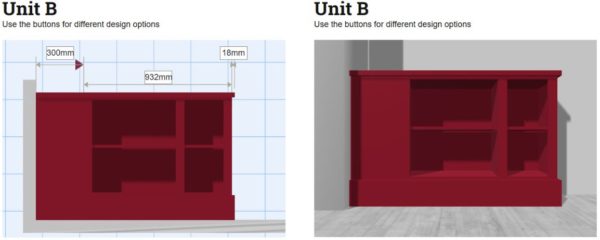
We will then need to adjust Unit B’s left-hand side (LHS) so it fits neatly against the corner wall. We will also need to create a flat surface on Unit B for Unit A to fit to seamlessly onto it.
To do this, position Unit B against a left-hand wall by navigating to Advanced > Situation > LH Corner. Then, to create a flush surface for Unit A to sit against, increase the left-hand inset of unit B by the depth of Unit A via Advanced > Fitting > Insets. Here, change the 18mm inset on the left to (in this case) 300mm.
To even out the sections, you can go to Size > Sections and adjust the figures as desired
Step 4.
For Unit A to fit seamlessly against Unit B, the top and skirting will need to be cut short on site, as they will currently extend 18mm beyond the main body of the unit.
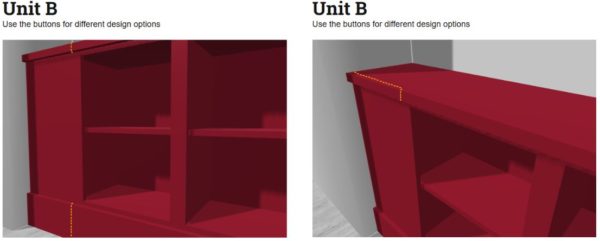
If you want to minimise cutting, you can request the Jali Office to omit the unit top and then you can create your own with a suitable cut-out through our Tops product. In doing so, you would only need to trim the skirting.
Step 5.
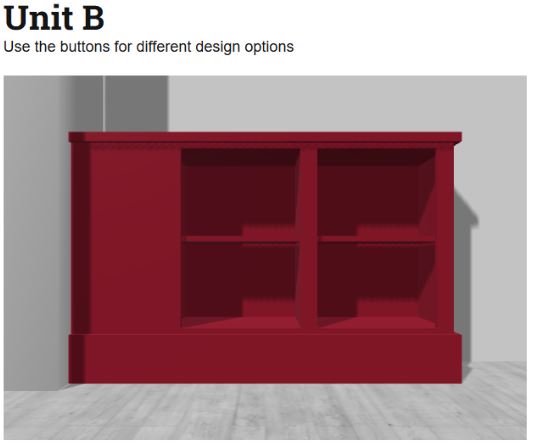
Once you have made these two minor adjustments to Unit B, you will have a flat surface for the other unit to sit against seamlessly.
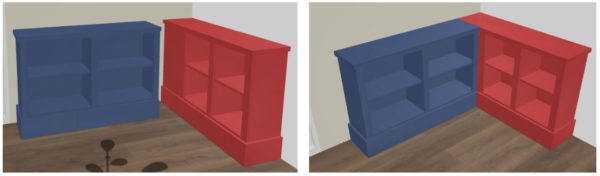
For the perfect finish, we recommend ordering the unit unpainted or white-primed, allowing you to fill any gaps during the DIY process and paint it in your chosen colour.